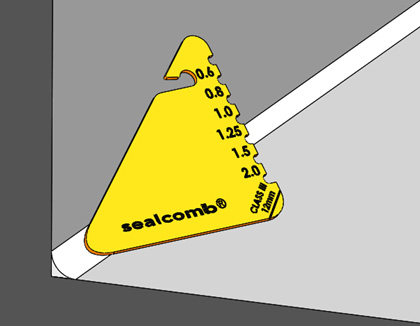
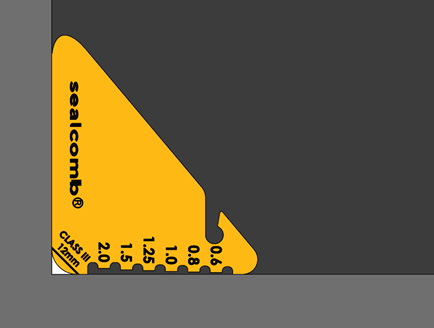
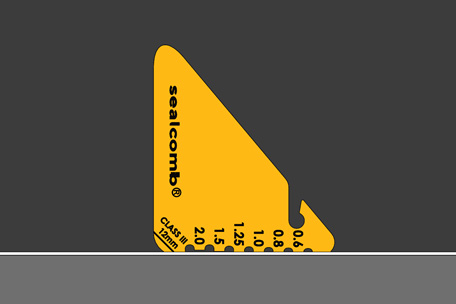
Note: The tool should be held on approximately a 45-degree angle to the internal corner for best results.
Note The 12mm size is measured along the hypotenuse edge (long edge) of the triangle. This is represented by the horizontal line on the tool.
STEP 1 Ensure surfaces have been adequately cleaned and prepared as pre manufacturer’s specifications.
STEP 2 Install manufacturers specified sealant to internal junction to between the floor and wall lining prior to the waterproof membrane installation, and or as manufacturers specifications.
STEP 3 Use the Class III sealcomb to cut the sealant to form the cove/ fillet in the corner to support the waterproof membrane transition from a vertical to horizontal surface.
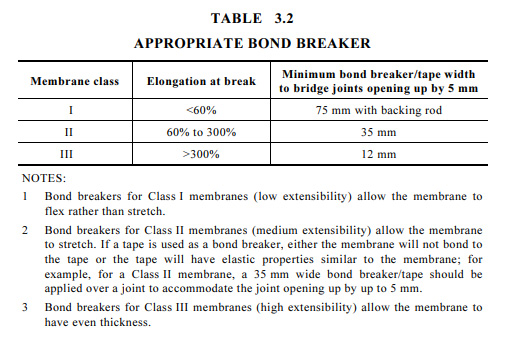
STEP 4 Check the cove size in the corner with the sealcomb checking gauge AS3740-2021 states a 12mm cove/ fillet should be formed for a Class III membrane.
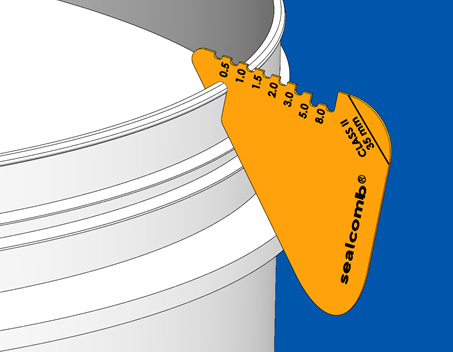
STEP 5 Remove any excess sealant and hang sealcomb on your bucket until next use.
WET FILM GUAGE
Directions for use and guidance
Press the Wet Film gauge component into wet coating. Withdraw upward and identify the deepest tooth having membrane coated on it and the next highest tooth that does not have membrane coated on it. The exact wet film thickness will lie between these two readings. Clean the tool after each use.
STEP 6 (During membrane installation) Dip the sealcomb wet film gauge into the freshly applied liquid membrane to measure the wet film thickness of the liquid membrane.
Note: For best results, the wet film gauge should be as a guide in several locations every 1 square meter and the results recorded. If, the required tooth of the tool does not display any membrane on the surface of the tooth simply apply more membrane immediately and re-measure.
CLASS II
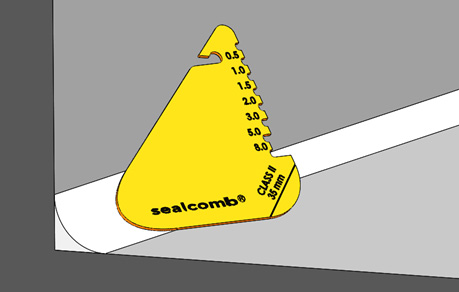
Note: The tool should be held on approximately a 45-degree angle to the internal corner for best results.
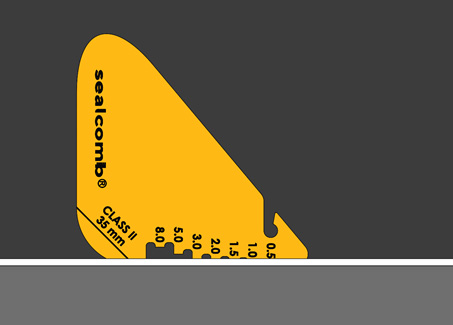
Note The 35mm size is measured along the hypotenuse edge (long edge) of the triangle. This is represented by the horizontal line on the tool.
STEP 1 Ensure surfaces have been adequately cleaned and prepared as pre manufacturer’s specifications.
STEP 2 Install manufacturers specified sealant to internal junction to between the floor and wall lining prior to the waterproof membrane installation, and or as manufacturers specifications.
STEP 3 Use the Class III sealcomb to cut the sealant to form the cove/ fillet in the corner to support the waterproof membrane transition from a vertical to horizontal surface.
STEP 4 Check the cove size in the corner with the sealcomb checking gauge AS3740-2021 states a 35mm cove/ fillet should be formed for a Class II membrane.
STEP 5 Remove any excess sealant and hang sealcomb on your bucket until next use.
STEP 6 (During membrane installation) Dip the sealcomb wet film gauge into the freshly applied liquid membrane to measure the wet film thickness of the liquid membrane.
SEALCOMB PRODUCT DISCLAIMER
Sealcomb Class 2 and Class 3 are only to be used for their intended purpose as a film thickness gauge and internal bond-breaker/fillet size gauge. Sealcomb is not responsible for any problems that may arise from the use of the tool as it is to be used as an approximate gauge only. Sealcomb doesn’t guarantee the “suitability” of its product for any purpose and doesn’t assume any liability for whatever happens when using their products.